Automatically Save Qonto Invoices to Google Drive with Make – Step-by-Step Guide + Workflow
The full automation, in your inbox
Automatically Save Qonto Invoices to Google Drive with Make – Step-by-Step Guide + Workflow

Automatic Qonto Invoice Backup to Google Drive with Make – Full Guide + Downloadable Workflow
Requirements: Make instance & API keys.
! You'll needRequirements: Make instance & API keys.
- A Make account — the free tier covers most scenarios; upgrade only if you hit the operations cap.
- API credentials for the services used in this workflow.
The full automation, in your inbox
Make workflow breakdown.
01 Step 01Set Up the “Watch Updated Transaction” Module in Qonto.
The automation starts with Qonto’s Watch Updated Transaction module. You’ll need to enter your Qonto IBAN and set the limit to 1 transaction per run. This module can be scheduled to run at regular intervals (hourly, daily, etc.), depending on your preferences, as shown in the image beside.
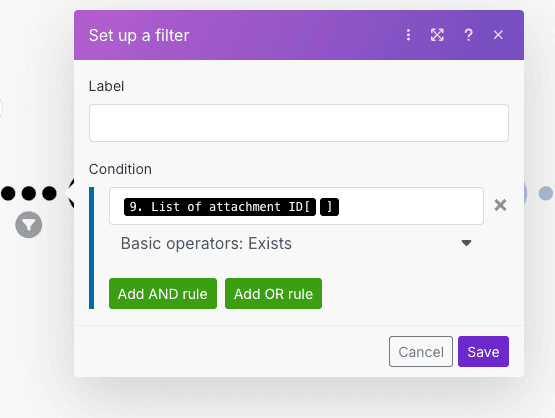
02 Step 02Check for an Invoice Attachment Using a Filter.
Next, a filter is applied to check whether the Qonto transaction includes an attachment—specifically, an invoice. The scenario only continues if an invoice is actually present, as shown in the screenshot.
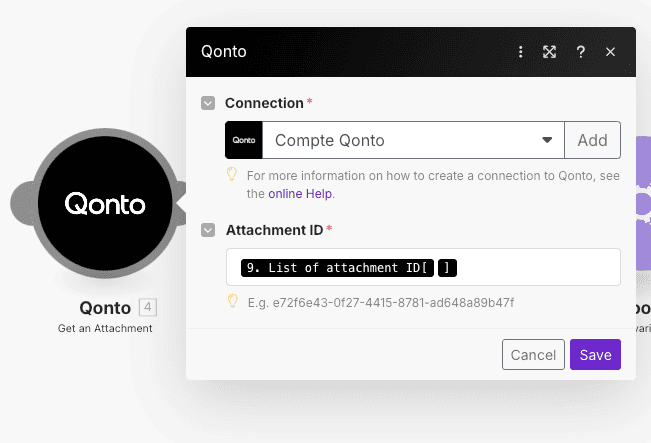
03 Step 03Retrieve the Invoice Using Qonto’s Get an Attachment Module.
At this stage, the Get an Attachment module from Qonto is used. You provide it with the Attachment ID from the previous transaction step to retrieve the exact invoice.
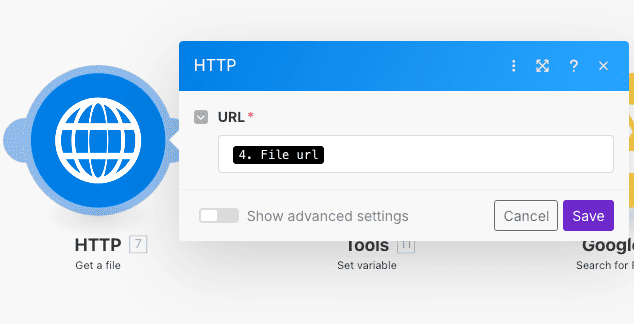
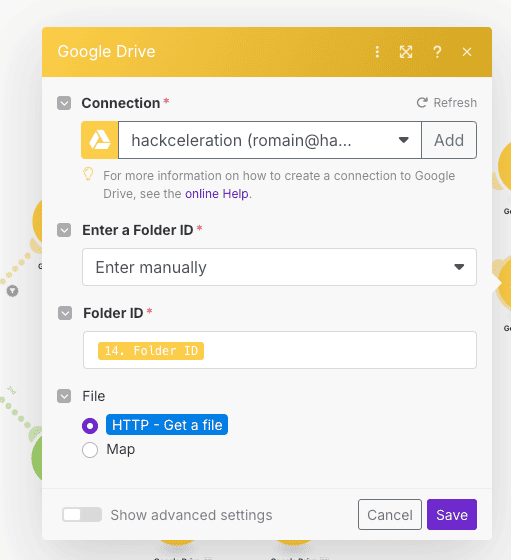
04 Step 04Download the Invoice Using HTTP Get a File.
Once the attachment is retrieved, the HTTP Get a File module is used to download the invoice using the URL previously provided by Qonto.
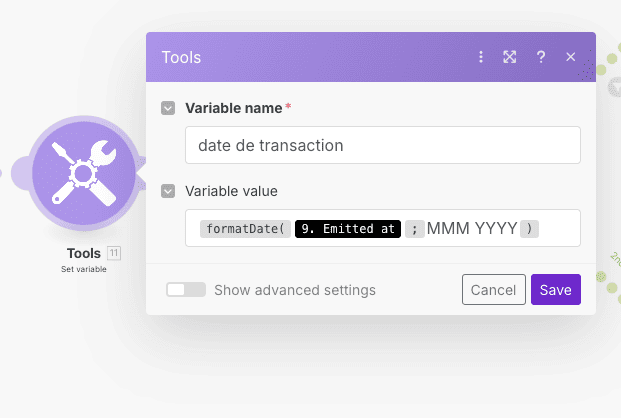
05 Step 05Create a Transaction Date Variable.
Next, you create a variable called transaction date using the Set Variable module. Define this variable with the following formula:
formatDate(date; "MMM YYYY"), which clearly formats the transaction date.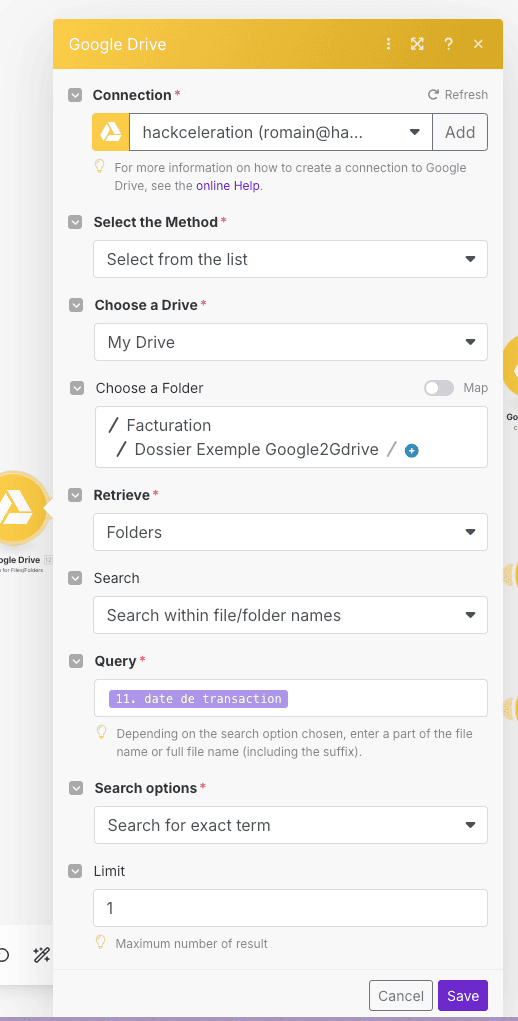
06 Step 06Search for an Existing Folder in Google Drive.
Using Google Drive’s Search for File or Folder module, search within your specified directory (e.g., example “facturation” folder) for a folder named exactly after the transaction date variable created earlier. Enable “search for exact term” and limit the results to 1.
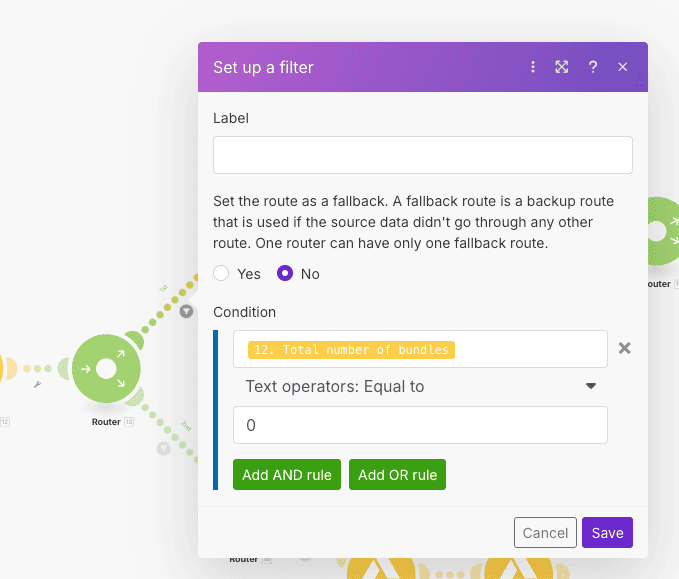
07 Step 07Filter to Check If the Date-Named Folder Exists.
Next comes a router that splits the scenario into two paths based on whether the Google Drive folder already exists. The current filter checks if the folder with the specific date does not exist yet.
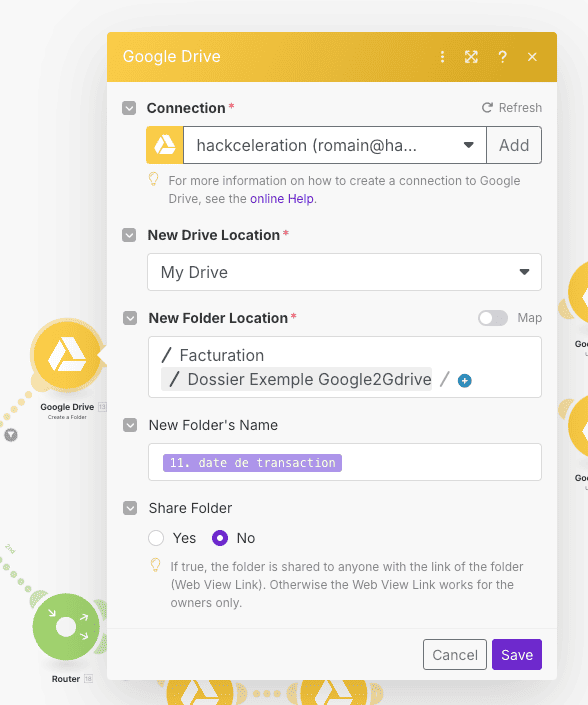
08 Step 08Create a New Date-Named Folder in Google Drive.
In this case, you use Google Drive’s Create Folder module to create a new folder inside your base directory, named exactly after the transaction date defined earlier.
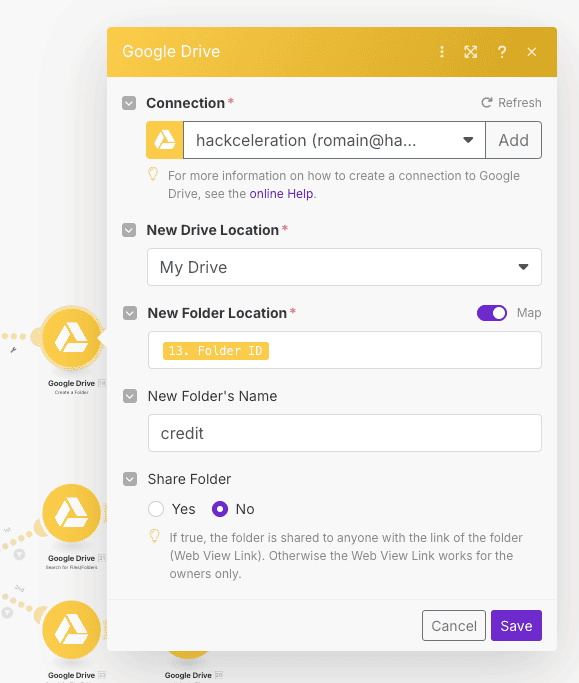
09 Step 09Create a “Credit” Subfolder in Google Drive.
Next, inside the newly created date folder, you use the Create Folder module again to add a subfolder named credit, setting the date folder as its parent directory.
10 Step 10Create a “Debit” Subfolder in Google Drive.
Using the Create Folder module again, you also create another subfolder named debit within the same parent date folder.
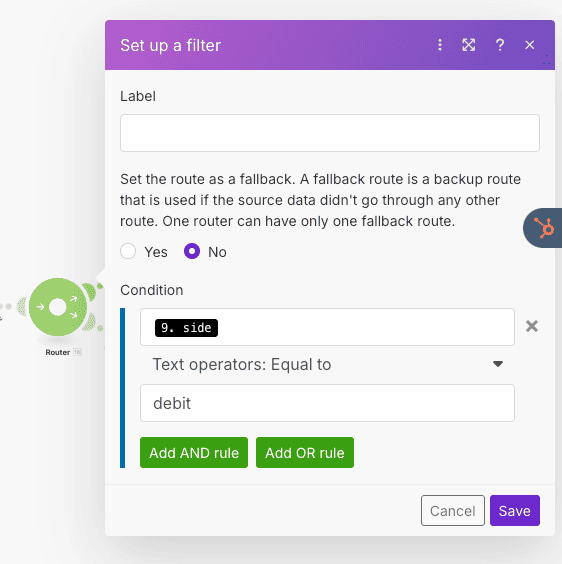
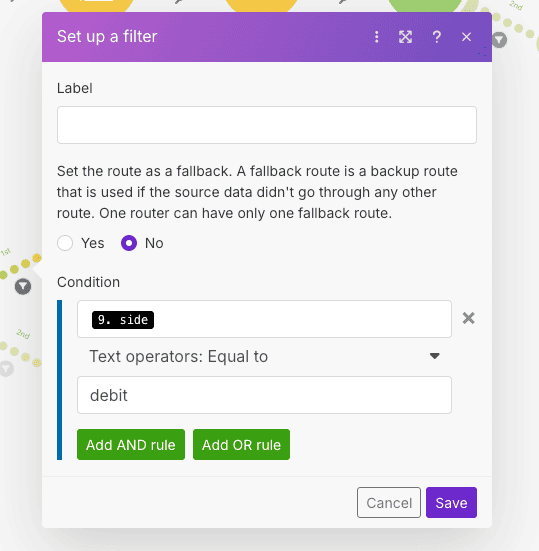
11 Step 11Apply Filter for Debit Transactions.
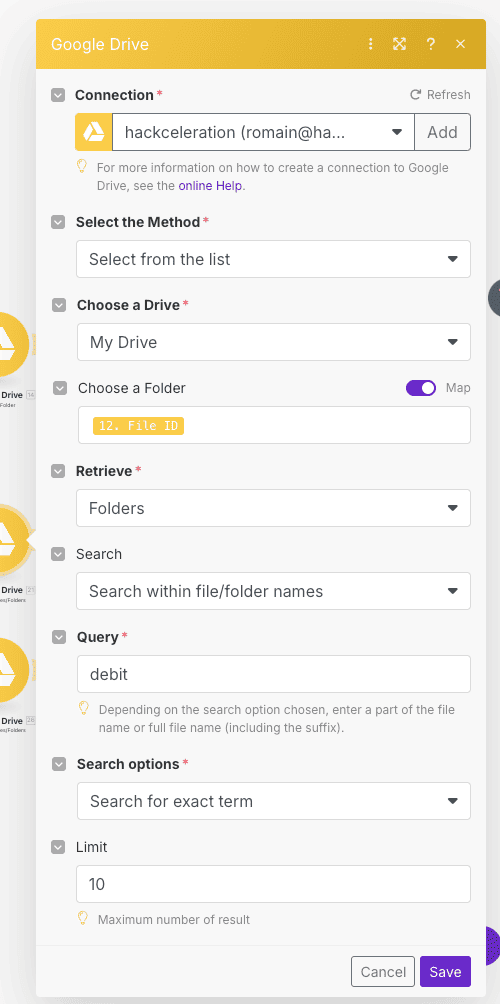
The first path after a new router: apply a filter to select only debit transactions from Qonto, as shown in the screenshot.
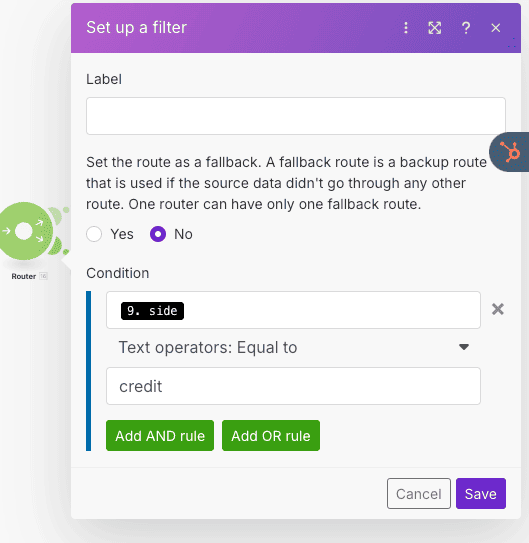
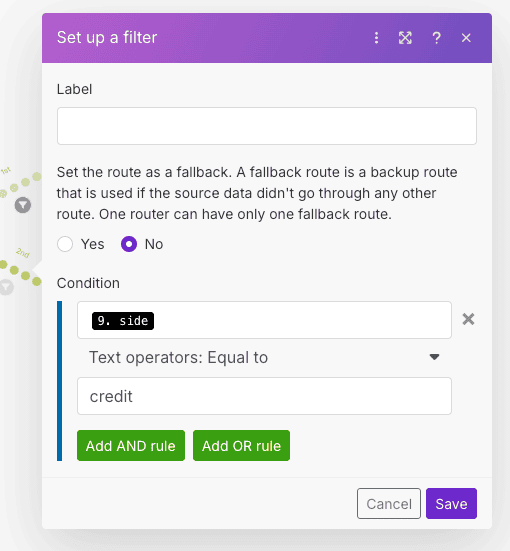
12 Step 12Apply Filter for Credit Transactions.
The second path: apply a filter to select only credit transactions from Qonto, as shown in the corresponding image.
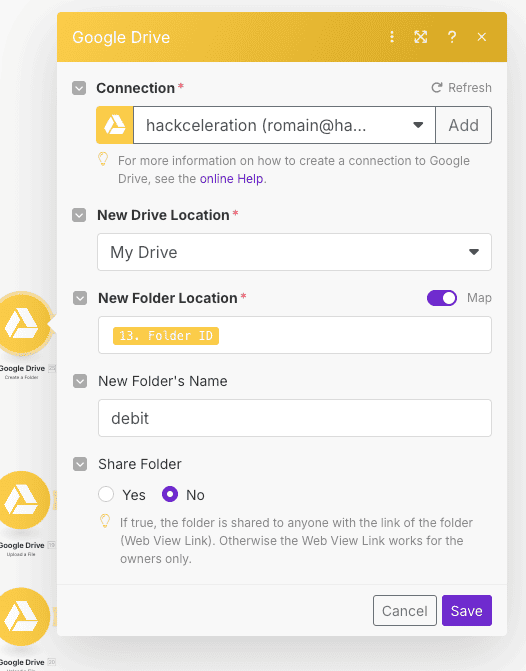
13 Step 13Upload Debit Invoice to Google Drive.
For a debit transaction, use Google Drive’s Upload a File module. Set the target folder as the debit subfolder you just created, and upload the file retrieved earlier via the HTTP module.
14 Step 14Upload Credit Invoice to Google Drive.
Similarly, for a credit transaction, use the Upload a File module again—this time selecting the credit subfolder as the destination, and uploading the same file retrieved via the HTTP module.
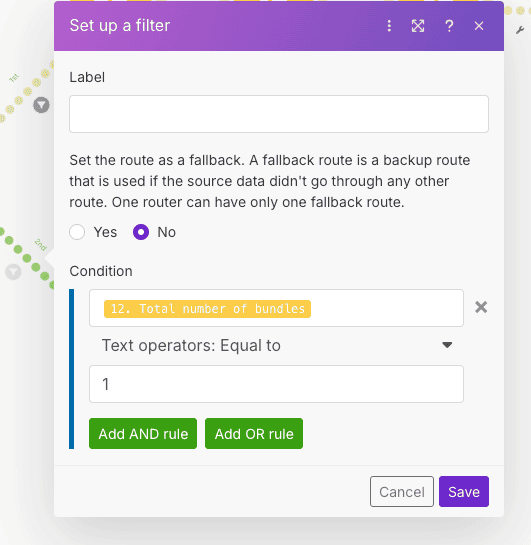
15 Step 15When the Date Folder Already Exists.
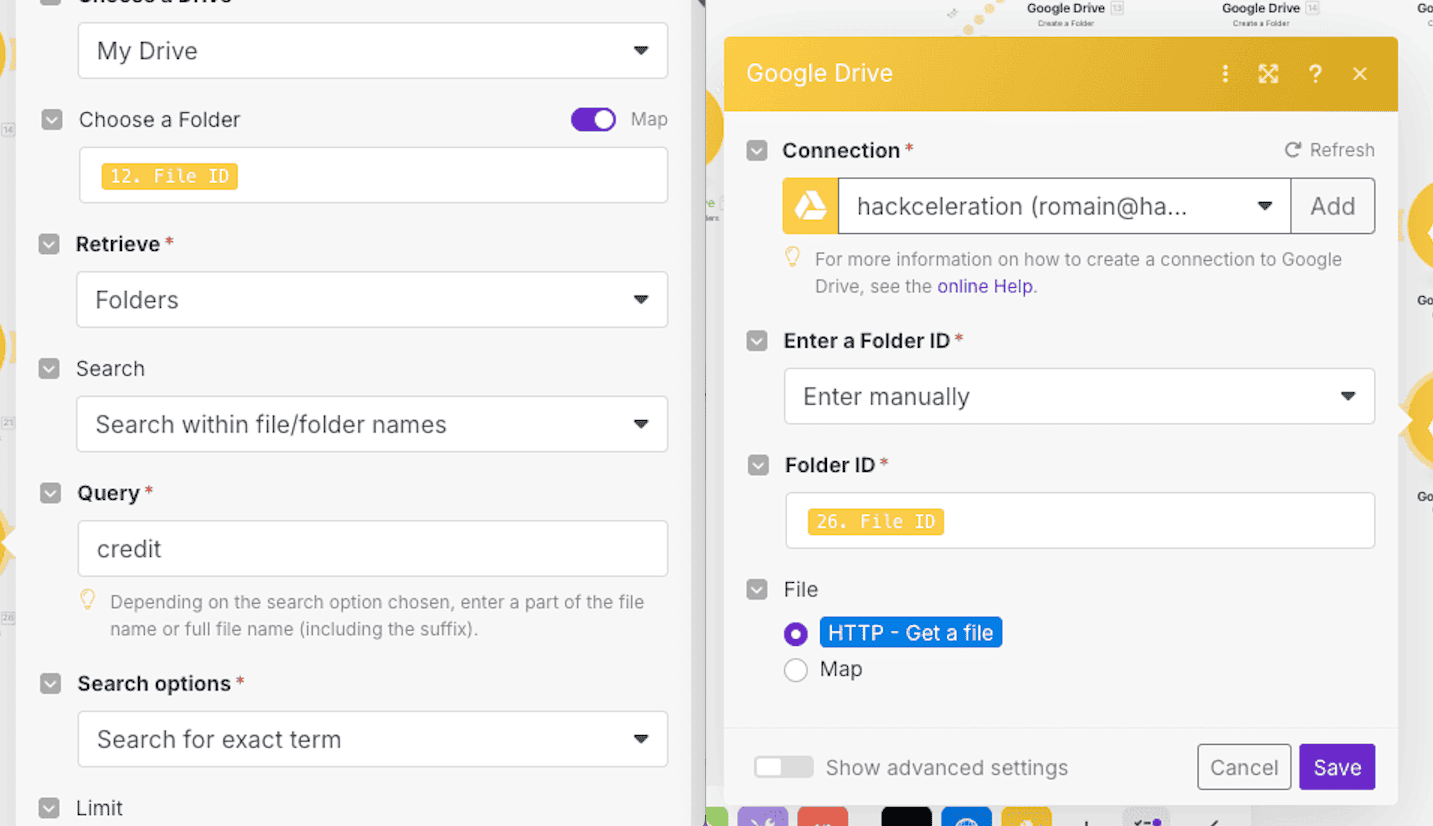
Now, let’s go back to the case where the date-named folder already exists (filter: "total number of bundles = 1"). This path is clearly illustrated in the corresponding image.
16 Step 16Filter for Debit Transactions When Folder Already Exists.
In this alternate path, apply a debit filter to select only transactions of this type when the date folder already exists.
17 Step 17Filter for Credit Transactions When Folder Already Exists.
Next, apply a credit filter to select only transactions of this type within the same alternate path, when the date folder already exists.
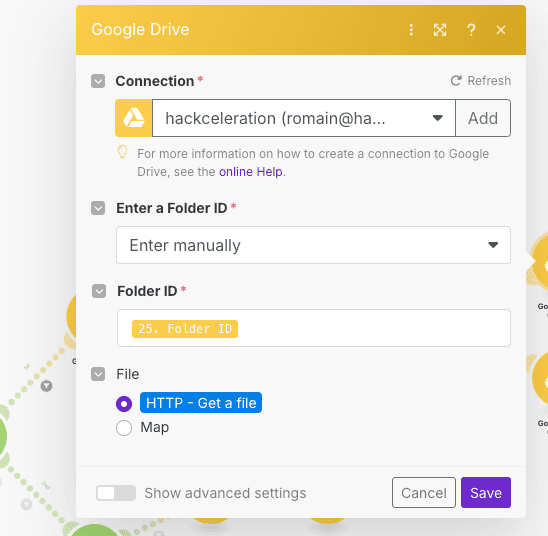
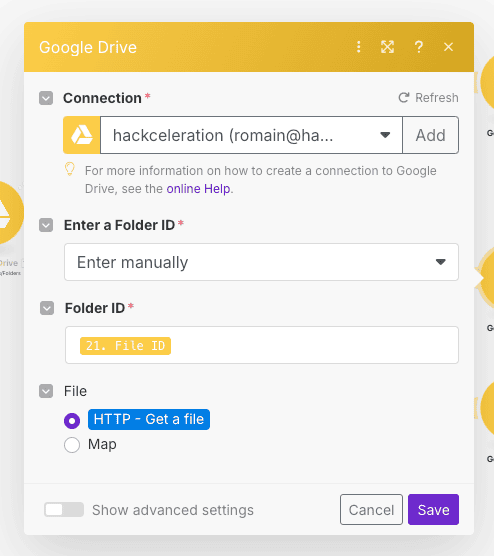
18 Step 18Search for Existing Debit Folder.
For debit transactions, use Google Drive’s Search for File or Folder module to specifically locate the debit subfolder inside the existing date folder.
19 Step 19Upload Debit Invoice to Existing Folder.
Once the folder is found, use Google Drive’s Upload a File module to upload the invoice directly into the existing debit subfolder.
20 Step 20Search and Upload Credit Invoice to Existing Folder.
For a credit transaction, first search for the existing credit folder, then use the Upload a File module to upload the invoice retrieved via the HTTP module.
Learn how to easily automate the filing of your Qonto invoices to Google Drive with Make. Save time, reduce errors, and streamline your accounting in just a few clicks. Follow the complete step-by-step guide or download the ready-to-use workflow instantly!
-90% Manual Workload
eliminated from managing and organizing Qonto invoices
3X Faster Response Time
in accounting processing through automatic filing in Google Drive
100% DE FACTURES CENTRALISÉES
in organized folders ready for accounting export
Get the ready-to-import Make JSON plus the install guide
Drop your email and we'll send you the complete scenario.
- Make JSON ready to import
- Written setup guide
- Video tutorial included
The full automation, in your inbox.
Make JSON, written guide and video tutorial, everything to ship this in under 15 minutes.
- Complete Make scenario JSON
- Step-by-step setup documentation
- Full video walkthrough